S3 Website with Terraform
- Overview
- Getting started
- Set up your domain
- Using AWS Certificate Manager to enable HTTPS traffic
- Distributing with CloudFront
- Correcting resource URLs with Lambda
- Static files in S3
- Applying the Terraform
- Deploy your website
Overview
In this tutorial, you will step through setting up secure static web hosting on AWS with Terraform.

The image above shows the flow between AWS services that you need for your website.
A request to view the website will be routed to your domain, which will be configured in Route53. AWS Certificate Manager is set up with Route53 and CloudFront to allow HTTPS traffic. When the request reaches the CloudFront distribution an edge lambda function is invoked to rewrite the URL so that it points to the correct resources stored in the S3 bucket.
At this point, you might be asking yourself, "Hey, I thought that S3 had static website hosting built-in?". Unfortunately, The static web hosting provided by the S3 bucket does not allow you to set up SSL/TLS correctly, which is what you need CloudFront for.
Getting started
This tutorial assumes that you have the following:
- AWS command line installed
- Terraform cli tool installed
- A registered domain name
The code in this tutorial is available on github. You can add it to your project and modify it as necessary.
We will be going through the diagram above and explaining some of the resources created in the terraform files. You will see that each terraform file is named for the primary resources it creates to keep things organized.
We will start on the left side of the diagram and talk about how a request flows through the resources to return the website.
Set up your domain
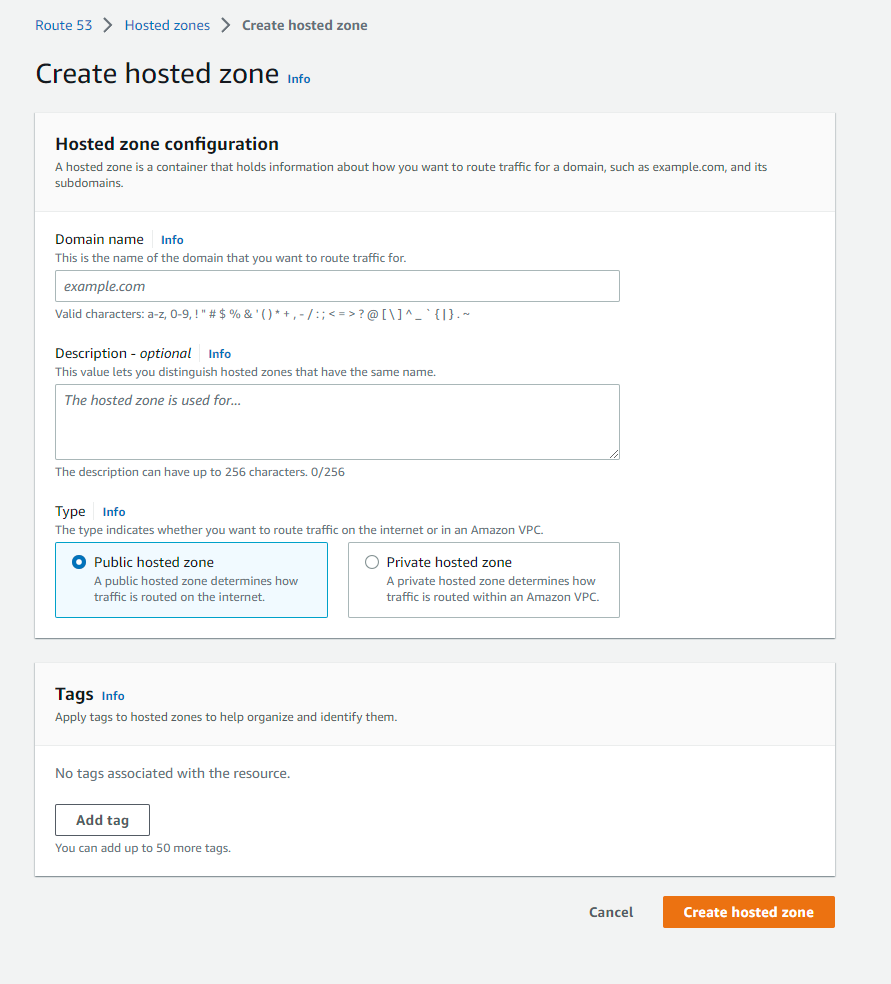
The first thing you need to do is set up your domain so that network traffic is routed to AWS resources. You will need to do some manual setup to create a hosted zone. In the AWS console navigate to Route 53 and create a new hosted zone for your domain.
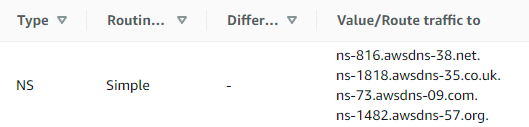
After your hosted zone is created you can enter the namespace info into your domain registrar.
Once that is complete you can fill in the domain name in the settings.auto.tfvars file.
prefix      = "dev"
domain_name = "<yourdomain.here>"
These variables are defined in the
vars.tf
file and allow for any of your terraform files in that directory to use them. This is exactly
how we can retrieve our hosted zone info in
route53.tf.
data "aws_route53_zone" "domain" {
  name = var.domain_name
}
Using AWS Certificate Manager to enable HTTPS traffic
Next up, We need to use AWS Certificate Manager to create an SSL/TLS certificate
so that you can secure your website and allow HTTPS traffic. We do this by creating
an aws_acm_certificate resource in
acm.tf.
resource "aws_acm_certificate" "domain" {
  domain_name       = var.domain_name
  validation_method = "DNS"
}
Your certificate needs to be validated before it can be used. This is done by
creating an aws_acm_certificate_validation in
acm.tf
with a reference to an aws_route53_record in
route53.tf.
It can take a few minutes to validate the domain, but once that is done you can use this certificate to secure your requests to CloudFront.
Distributing with CloudFront
AWS CloudFront is a content delivery network that makes your website loads quickly by having servers close to the end users and by allowing for content caching.
We use CloudFront to provide secure access to the contents of your S3 bucket
that we created in
s3.tf.
resource "aws_s3_bucket" "domain" {
  bucket = "${var.prefix}-${var.domain_name}"
}
And we connect the bucket to the CloudFront distribution as the origin in
cloudfront.tf.
resource "aws_cloudfront_distribution" "s3_distribution" {
  origin {
    domain_name = aws_s3_bucket.domain.bucket_regional_domain_name
    origin_id   = aws_s3_bucket.domain.id
  }
  ...
}
Your ACM certificate is also connected to the distribution to allow HTTPS traffic to CloudFront.
resource "aws_cloudfront_distribution" "s3_distribution" {
  ...
  viewer_certificate {
    acm_certificate_arn      = aws_acm_certificate.domain.arn
    ssl_support_method       = "sni-only"
    minimum_protocol_version = "TLSv1.2_2021"
  }
}
Note: Caching is disabled in the example which makes it a little easier to
develop against. This should be adjusted to something more sensible if you
aren't changing your website rapidly. See the documentation on
aws_cloudfront_cache_policy
for more details.
Correcting resource URLs with Lambda
CloudFront has an issue routing to the correct files in the S3 bucket.
Navigating to /articles/index needs to route to /articles/index.html
in the bucket. The solution is a lambda function that is connected to the
CloudFront distribution and is invoked on the
origin-request
event.
resource "aws_cloudfront_distribution" "s3_distribution" {
  ...
  default_cache_behavior {
    ...
    lambda_function_association {
      event_type = "origin-request"
      lambda_arn = aws_lambda_function.origin_request.qualified_arn
    }
  }
  ...
}
This lambda function
rewrites the URL to correctly append .html and index.html to the resource path
requested from the S3 bucket.
def lambda_handler(event, context):
    request = event['Records'][0]['cf']['request']

    if request['uri'][-1] == '/':
        request['uri'] += 'index.html'
    elif not '.' in request['uri'] and '/' in request['uri']:
        request['uri'] += '.html'
    elif not '.' in request['uri']:
        request['uri'] += '/index.html'

    return request
In lambda.tf you zip up the lambda code and configure the function.
data "archive_file" "zip" {
  type        = "zip"
  output_path = "lambda_zip_file_int_1.zip"
  source {
    content  = file("../lambdas/origin-request.py")
    filename = "origin-request.py"
  }
}

resource "aws_lambda_function" "origin_request" {
  filename         = data.archive_file.zip.output_path
  source_code_hash = data.archive_file.zip.output_base64sha256
  handler          = "origin-request.lambda_handler"

  function_name = "${var.prefix}-origin_request"

  runtime = "python3.9"

  role    = aws_iam_role.lambda_edge_exec.arn
  publish = true
}
The lambda also needs an execution role with permissions to run as an edge lambda.
Static files in S3
Your S3 bucket will be storing the output of your website build. Since you are providing access to your content through CloudFront you can configure your bucket to block public access.
resource "aws_s3_bucket_public_access_block" "domain" {
  bucket = aws_s3_bucket.domain.id

  block_public_acls       = true
  block_public_policy     = true
  ignore_public_acls      = true
  restrict_public_buckets = true
}
There are some configurations in s3.tf to allow specified accounts or roles to push to your bucket. You shouldn't need this right away, but it will be helpful if you set up a CodeBuild for publishing your website changes off of a GitHub push or similar build system.
CloudFront also needs permission to read files from your bucket which you can grant with the following policy.
data "aws_iam_policy_document" "allowed_accounts" {
  statement {
    actions   = ["s3:GetObject"]
    resources = ["${aws_s3_bucket.domain.arn}/*"]

    principals {
      type        = "AWS"
      identifiers = [aws_cloudfront_origin_access_identity.domain.iam_arn]
    }
  }
  ...
}
Applying the Terraform
Now that you understand what your Terraform files will create, let's run Terraform and get your infrastructure ready to host your website.
Terraform has several commands you will be using:
terraform init- Initializes the Terraform environment and downloads any package dependencies. (like the AWS provider)terraform plan- Tells you what terraform will create based on changes you have made in your terraform files and what is deployed in your environment.terraform apply- Creates or updates your infrastructure to what is shown in the output of your terraform plan.terraform destroy- Removes all resources created by Terraform from your environment.
By default, Terraform will create a state file in the directory in which you called the apply command. It is important to not lose this file. Terraform allows you to configure backend storage for the state file. For example, you could store it in S3.
Deploy your website
With your infrastructure in place, it's now time to get your website content into the S3 bucket.
For this, you can use the S3 sync command in the AWS CLI to fully replace the contents in your bucket with the content of the current directory.
aws s3 sync . s3://<your_bucket> --delete --acl bucket-owner-full-control
Once the sync is done you should be able to navigate to your website!
If you don't have a website ready yet check out my comparison of some of the UI frameworks or look into using a static website generator like HUGO.