Create a Custom Email Domain with iCloud+ and AWS Route53
- Overview
- Requirements
- Create Custom Email Domain in iCloud+
- Update your DNS records with AWS Route53
Overview
It used to be that you could get a Gmail account for your domain just by hosting a file on your site. Now Google Workspaces makes you pay. I could pay the $6 a month... Nah.
While looking for an alternative, I found a support article from Apple: Use Custom Email Domain with iCloud Mail. While iCloud+ is not free, it is only $1 a month for 5 custom email domains. Google Workspaces is likely a better option if you have more than a single user, but for a single user or family, iCloud+ looks like a great option.
I currently have my DNS server set up with AWS Route53. So in this tutorial, We will set up iCloud+ and AWS Route53 to send emails from your domain.
Requirements
This tutorial assumes that you have the following:
- An iCloud+ subscription.
- A registered domain name
- An AWS account with your domain set up as a hosted zone in AWS Route53
Create Custom Email Domain in iCloud+
You can use the icloud+ settings page to set up your email domain, or from an Apple device of your choice in the iCloud settings.
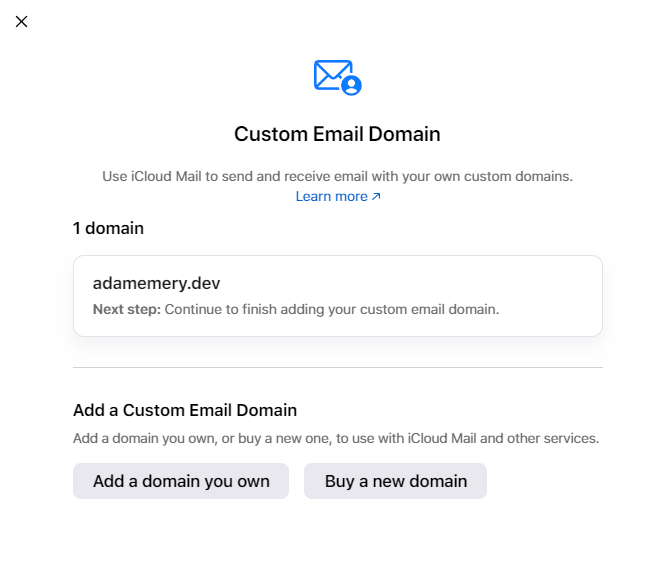
When you click on Custom Email Domain you will be able to add your domain or register a new one.
Then you can select to share the domain with other iCloud+ users in your family.
Once you have added your domain you can set up your email addresses like mail@example.com.
You can have 3 of these per domain, but you can also set a catch-all to receive all emails sent to your domain.
Update your DNS records with AWS Route53
iCloud will then ask you to update your DNS records with your domain registrar. In this case our DNS is with AWS Route53 and not the registrar.
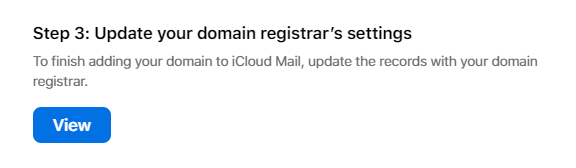
In the AWS Route53 console, you will need to add the following records to your hosted zone.
- TXT Record type for the root domain with the following value:
"apple-domain=<YOUR_SECRET>"
"v=spf1 include:icloud.com ~all"
- MX Record type for the root domain with the following values:
10 mx01.mail.icloud.com.
10 mx02.mail.icloud.com.
- CNAME Record type for the subdomain
sig1._domainkeywith the following value:
sig1.dkim.adamemery.dev.at.icloudmailadmin.com.
Once you have added these records, you can go back to iCloud+ and verify the DNS records. It might take some time to update, but once the verification is complete you can start sending emails from your domain!